


Traditional web development approaches often grapple with the trade-off between dynamic content updates and site speed.
Enter Next.js 14, a revolutionary framework that merges the rapid updates of dynamic sites with the performance of static sites through innovative caching and on-demand revalidation techniques.
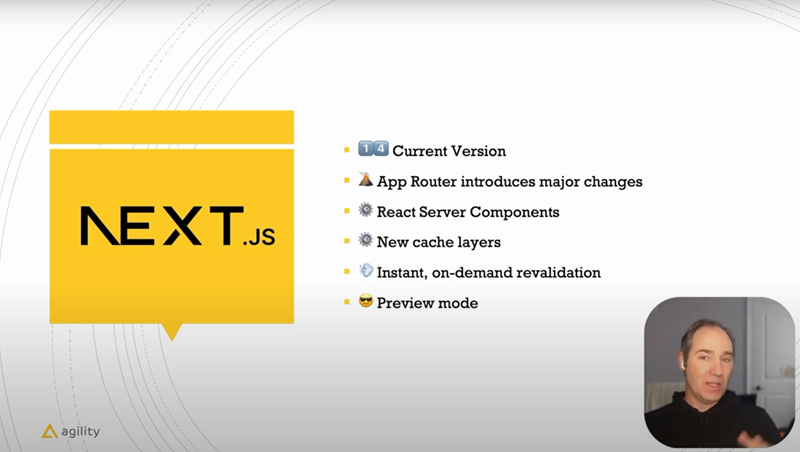
This guide will explore how to leverage these features, especially in conjunction with headless CMS, to achieve a blazing-fast, yet dynamically updatable website.
Follow along with our recent tutorial, or keep reading below:
Caching Overview
Caching is a crucial strategy for enhancing website performance. It involves storing copies of files or data in a temporary storage location, so future requests for that data can be served faster.
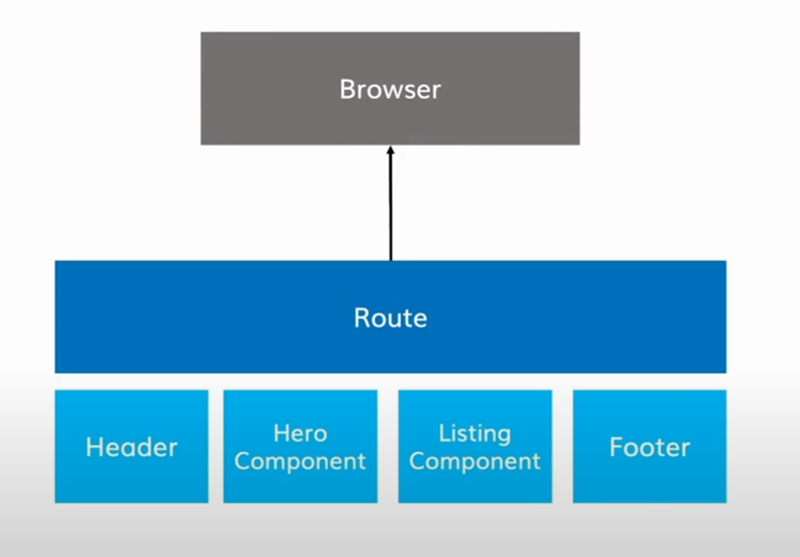
In the context of web development, caching can occur at various levels - from individual components like headers and footers to entire pages or responses. Effective caching reduces server load, decreases page load times, and provides a smoother user experience. However, the challenge lies in managing cache effectively to ensure content is up-to-date without manual intervention, which is where on-demand revalidation comes into play.
Steps for Implementing Caching and On-Demand Revalidation with Headless CMS Content in Next.js 14
Step 1: Project Setup and Static Site Generation (SSG)
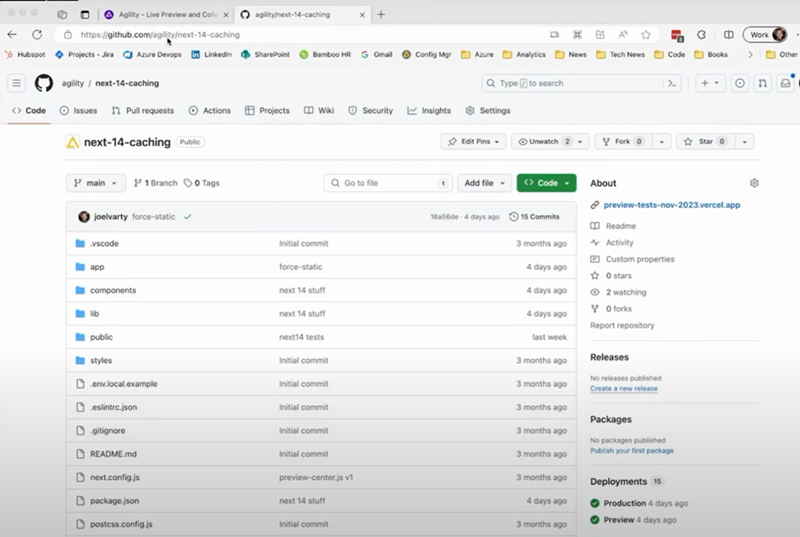
All of the code we're using is on github: GitHub - agility/next-14-caching
- Initialize Your Next.js 14 Project: Start by creating a new Next.js project if you haven't already. Ensure you're using Next.js 14 to take advantage of the latest features, start here: The Next.js Starter (agilitycms.com)
- Implement Static Site Generation: Use SSG for your pages to pre-render them at build time. This step improves initial load performance significantly, providing a solid foundation for dynamic updates through on-demand revalidation.
Step 2: Integrating Headless CMS
- Connect Your Headless CMS: Choose a headless CMS and integrate it with your Next.js application. This setup allows you to manage your content externally and publish updates without directly altering your site's codebase.
- Fetch Content Dynamically: Utilize Next.js's data fetching methods (getStaticProps and getStaticPaths) to retrieve content from your CMS. This approach ensures your content is up-to-date at build time, with the flexibility to revalidate post-deployment.
Step 3: Implementing On-Demand Revalidation
- Enable ISR (Incremental Static Regeneration): Configure ISR in your getStaticProps by setting the revalidate property. This tells Next.js how often it should check for updates to the content, allowing pages to be regenerated on-demand after content changes.
- Trigger Revalidation Through Your CMS: Set up webhooks in your CMS to notify your Next.js application of content updates. Use these webhooks to trigger revalidation, ensuring that updated content is reflected on your site without a full rebuild.
Step 4: Advanced Caching Strategies
- Component-Level Caching: Break down your site into reusable components and implement caching strategies for each. This granularity allows for efficient updates and reuses of content across your site.
- Server and CDN Caching: Leverage caching on your web server and Content Delivery Network (CDN) to further enhance delivery speeds. Tools like Vercel and Netlify offer built-in support for advanced caching strategies, making it easier to implement at scale.
Step 5: Preview Mode and Final Testing
- Implement Preview Mode: Integrate a preview mode to view content changes in real-time before they go live. This feature is crucial for content creators and marketers to verify updates without affecting the live site.
- Test and Deploy: Before deploying your changes, thoroughly test the caching and revalidation mechanisms to ensure they work as expected. Verify that content updates are reflected promptly and that the site maintains high performance.
Verifying Caching Effectiveness in Next.js 14
Ensuring your caching strategy works as intended is crucial for optimizing your website's performance. Next.js 14, with its advanced caching capabilities, provides a straightforward way to verify that caching is indeed functioning. Here's how to check if your caching setup is effective, particularly when using a platform like Vercel for hosting.
Step 1: Use Developer Tools for Inspection
- Open Developer Tools: Navigate to your site and open the Developer Tools in your browser. This is typically done by right-clicking the page and selecting "Inspect" or pressing Ctrl+Shift+I (Windows/Linux) or Cmd+Option+I (Mac).
- Go to the Network Tab: In the Developer Tools, switch to the "Network" tab. This area allows you to monitor all network requests made by your page.
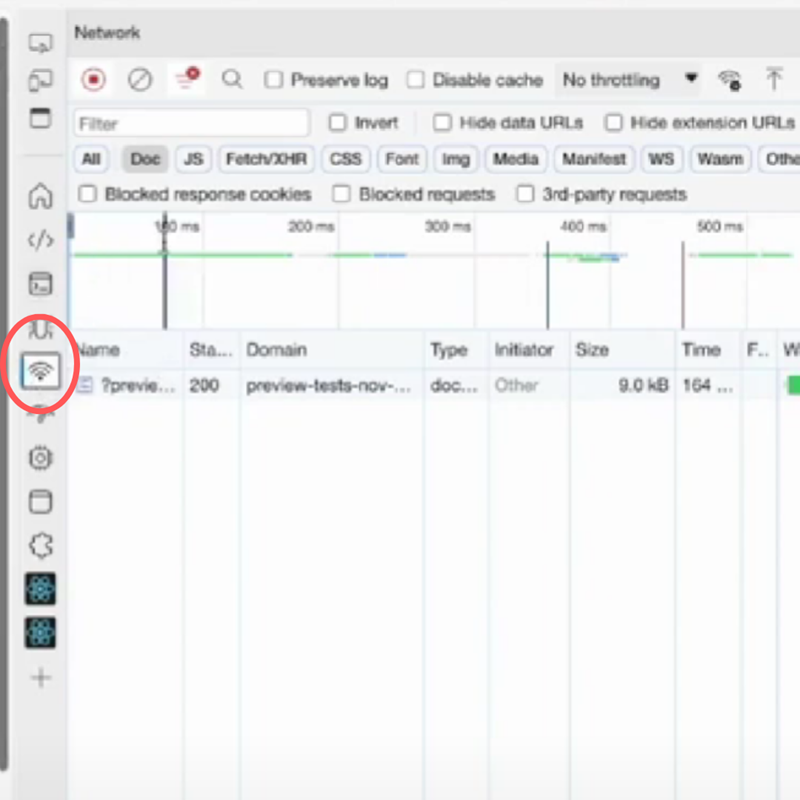
Step 2: Analyzing Network Requests
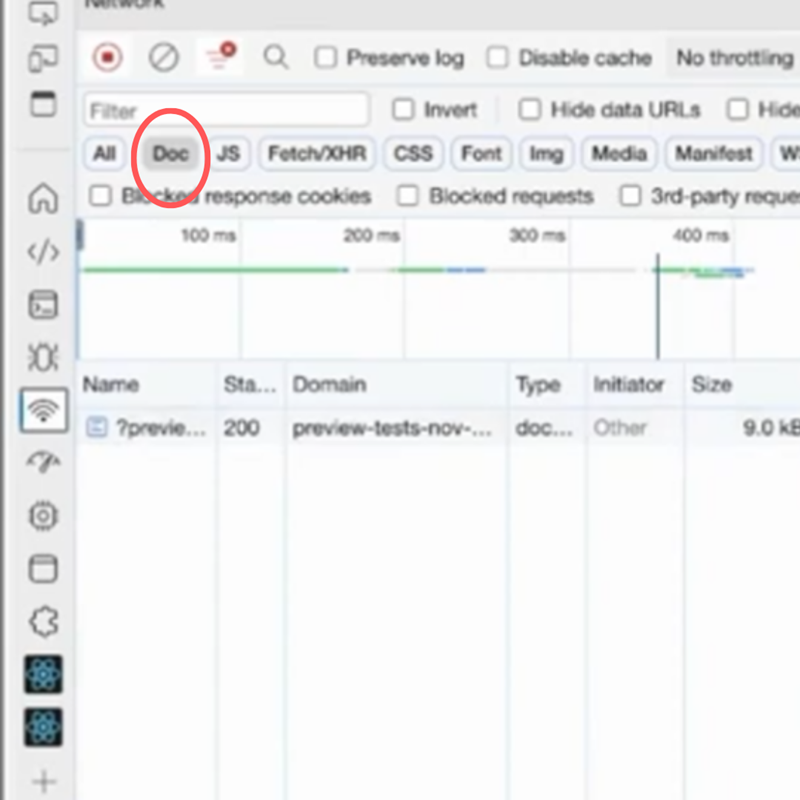
- Filter for Document Requests: Look for an option or filter to view only document-type requests. This might be labeled as "Doc" in some browsers, helping you to focus on the initial page load requests.
- Select the Main Document Request: Click on the main document request, which should represent the initial HTML document load of your page. This request is crucial for understanding the caching behavior.
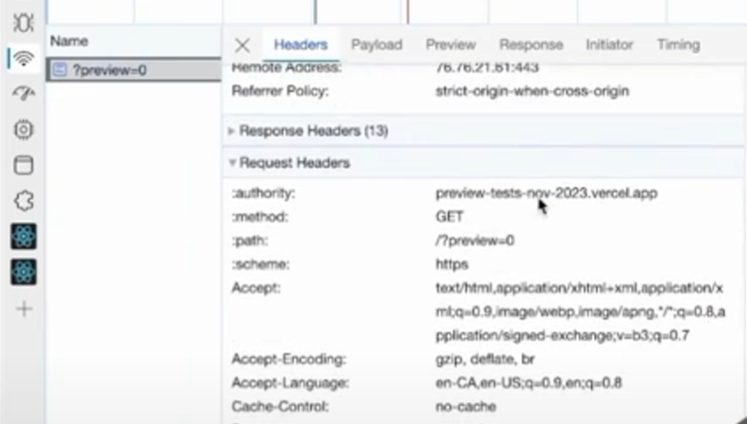
Step 3: Reviewing Response Headers
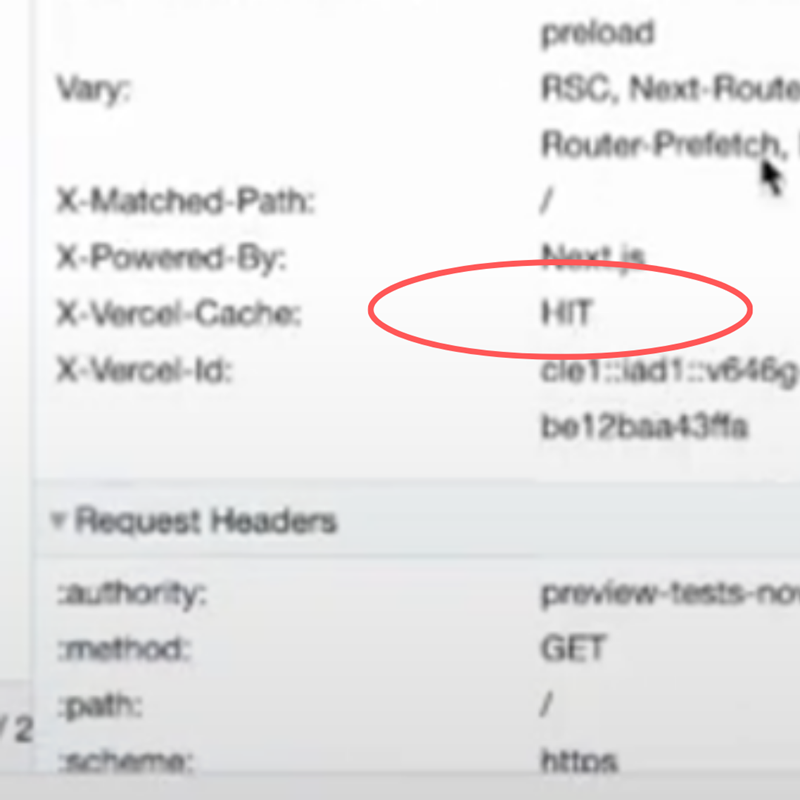
- Inspect Response Headers: With the main document request selected, inspect the response headers in the details pane. You are looking for indications that the response was served from cache.
- Identify Cache Hits: On platforms like Vercel, a "Vercel Cache Hit" in the response headers signifies that the request was successfully served from the cache. This is a clear indication that your caching strategy is working.
By following these steps, you can harness the power of Next.js 14 to create a website that combines the best aspects of static and dynamic web development. With advanced caching and on-demand revalidation, your site will offer an unparalleled user experience, marked by lightning-fast speeds and up-to-the-minute content updates.
